
Introduction
In the previous post we installed pgAdmin and PostgreSQL, and created a database. In this post, Lesson 001 of Learning Data Science, we’ll discuss database schemas and create a new schema in my_first_database. Since data analysis and management are best learned by doing, the objective of this and future posts is to get readers hands on experience using PostgreSQL and R. This lesson builds on the previous post, so if you haven’t installed PostgreSQL and pgAdmin, and create my-first-database, then please do so now following the instructions in the previous post.
For this post we’ll be using the files in the Lesson_001 folder in the learning-data-science repository. If you have not forked the learning-data-science repository please do so now following the instructions provided in the post Learning Data Science. If you are not familiar with version control using Git and GitHub, I recommend going back and working through the hands on tutorials in my series on version control starting with “Version Control: An Overview.”
References to Database Objects, Files, and SQL Keywords
In the text of this and future posts, I will refer to database objects (e.g., schemas, tables, columns) in italics, file names will be referred to in bold italics, and SQL keywords will be written in ALL CAPS.
Creating a Database Schema
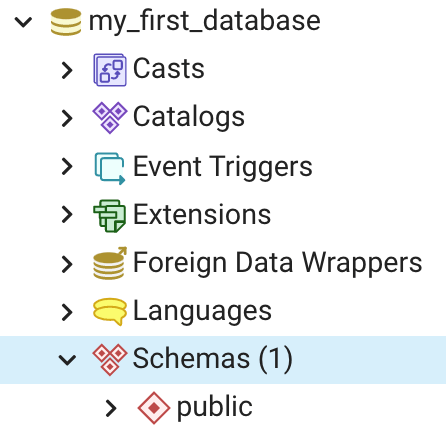
In PostgreSQL database schemas are used for organizing tables and other database objects, for instance views, and are similar in concept to a folder in a file structure. When a PostgreSQL database is first created it comes with a default schema that is entitled “public.” To see the public schema in my_first_database click on the Schemas node and the list of schemas will appear (Figure 1).
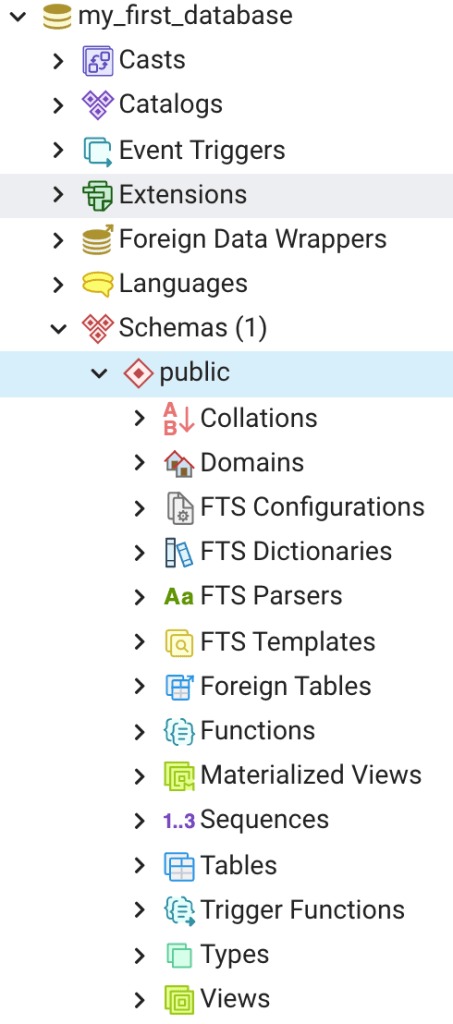
The only schema you will have at this time is the public schema. Click on the public schema and a list of items within the schema will appear (Figure 2). Notice that there are a number database objects organized within each schema. We’ll cover some of these in more detail in future blog posts. For now just focus on the fact schemas are used in PostgreSQL to organize database objects. You can create any number of schemas, and it’s worth taking some time upfront to think about how you want your database to be organized. For instance, you could have 3 schemas, 1) a schema that contains the domain data (i.e., the list of for values a data field), 2) a schema that contains the raw data as it was collected in the field, and 3) the public schema could be used to store the final QA/QC’ed data.
For instance, you could have 3 schemas, 1) a schema that contains the domain data (i.e., the list of for values a data field), 2) a schema that contains the raw data as it was collected in the field, and 3) the public schema could be used to store the final QA/QC’ed data. For the purposes of learning data science using this blog we will use the above schema model.
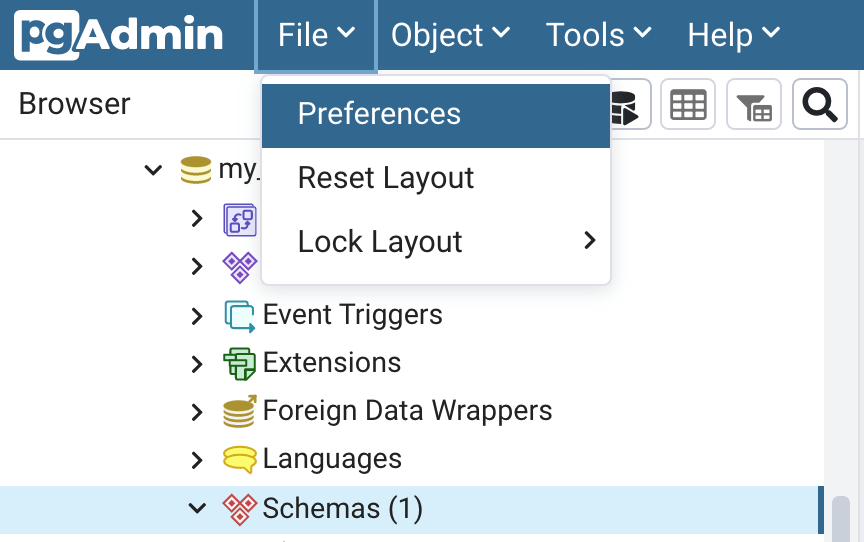
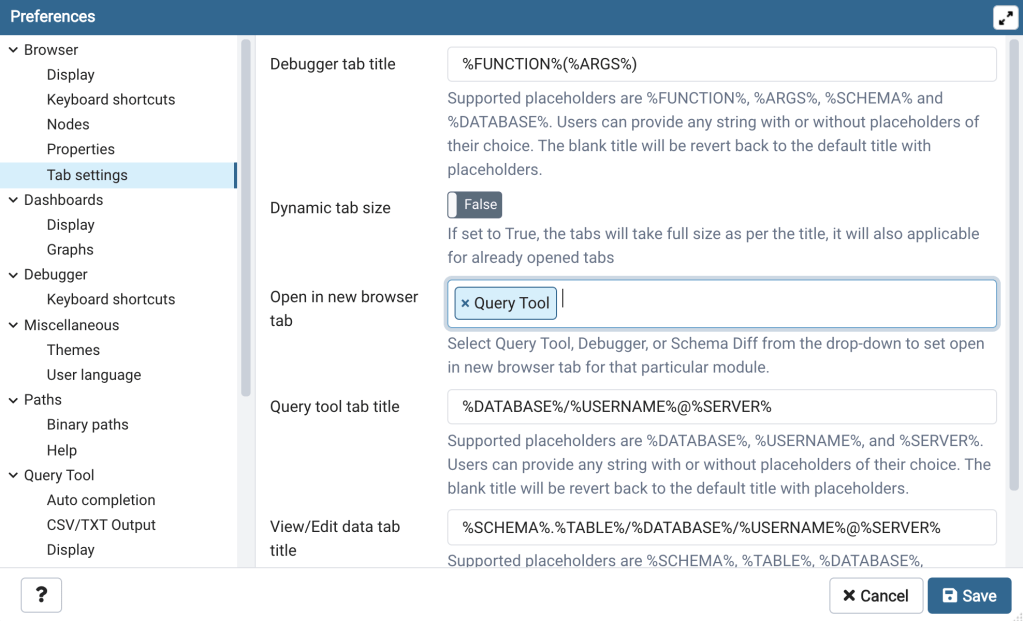
To begin we need to create a new schema to store the domain data tables. However, before we create the schema let’s update one pgAdmin setting so that Query Tool windows will open in a new browser tab. On the main pgAdmin page click on File, then on Preferences (Figure 3). The Preferences dialog window will open. Under the “Browser” node click on “Tab Settings” (Figure 4). Click in the cell next to “Open in new browser tab” and select Query Tool. Then click “Save” in the lower right corner. Now when you open a new Query Tool (described below) it will open in a new browser tab.
A Quick Side Note: The classic concept of a data domain as applied here, i.e., a list of data values that are allowable in a data column, is different from the concept of a domain in PostgreSQL (Figure 2, second node below public). A PostgreSQL domain is a user defined data type with optional constraints.
Creating a Schema using SQL
To create a schema using SQL follow the below steps:
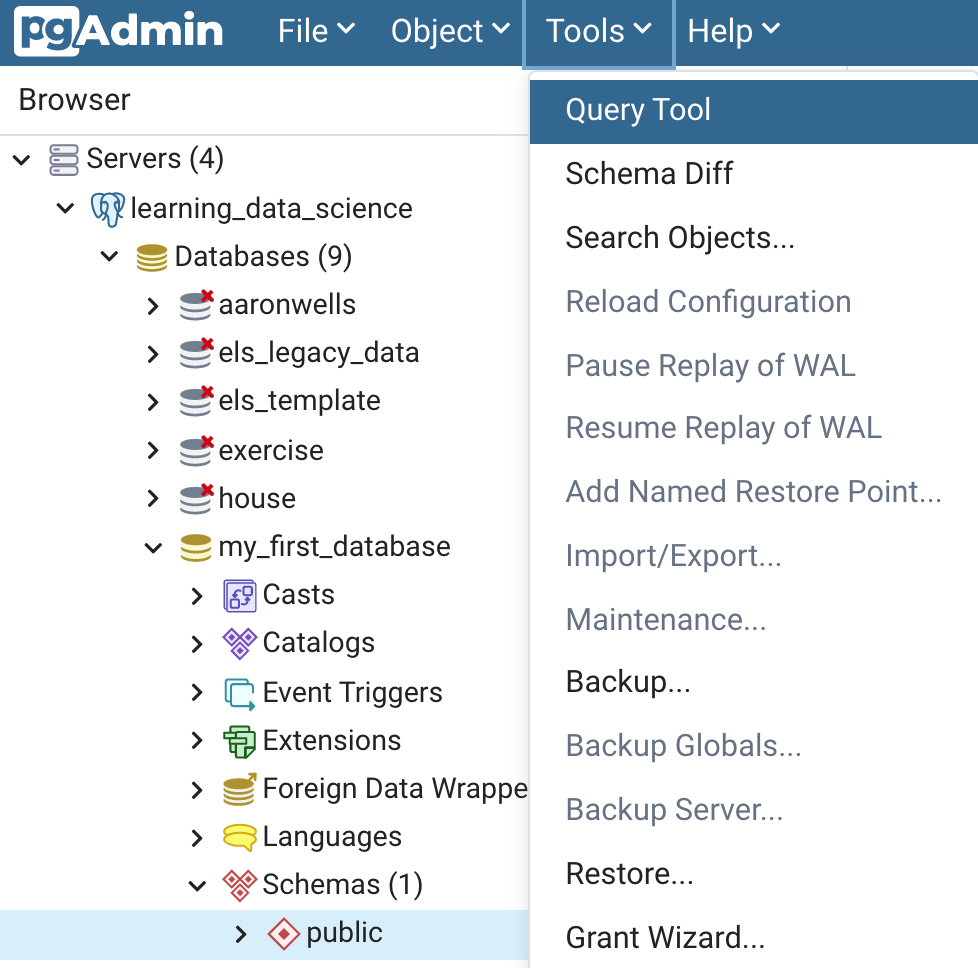
- First open a Query Tool. On the main pgAdmin page click on Tools, and then on Query Tool (Figure 5). A query tool will open in a new browser tab. The query tool in pgAdmin is used to run SQL commands and scripts.
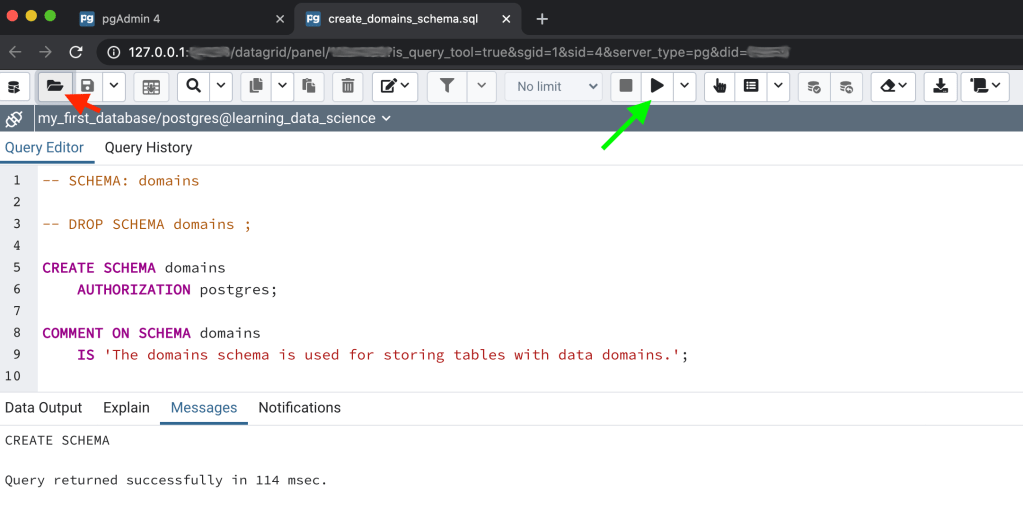
- Click on the Open File tool (Figure 6, red arrow) and navigate to the clone of your fork of the learning-data-science repository. Open the create_domains_schema.sql file under Lessons/Lesson_001. The sql file will open in the query tool (Figure 6).
- Click the Execute button (Figure 6, green arrow) to run the script and create the schema.
- You should now see that you have 2 schemas, domains and public.
Let’s briefly review the SQL in the create_domains_schema.sql file (Figure 6). The first 2 lines are “commented out” (i.e., text in a script file that is not interpreted as code). Commenting out lines in a script can be handy for adding metadata to a script (e.g., a description of the script or instructions on how to use the script), or if you only want to run the code in only part of a script when troubleshooting. In SQL files you can comment out a single line of code by preceding the line of text with 2 or more dashes (–). You can comment out multiple lines together by preceding the first line with /* and adding */ to the end of the last line as in the example below:
/*This is a multiple line
comment in SQL*/
The first commented out line describes what the script is intended to do, the second is the SQL command to DROP (i.e., delete) the schema. The commented out DROP code could be run if you wanted by simply deleting the 2 dashes and clicking the Execute button, in which case the script would first delete the schema and then create it again. There may be cases where you need to do this (e.g., changing the configuration of an existing schema), but in general you don’t want to drop schemas as all the tables and data within will also be deleted.
The next line tells PostgreSQL to create the schema, and the line below that is related to permissions on the schema, i.e., the user postgres is assigned as the owner. Lastly, the “COMMENT ON SCHEMA” tells PostgreSQL to create a comment on the domains schema. A COMMENT in PostgreSQL is a form of database metadata. It’s a good practice to add comments using the COMMENT ON command to all database objects. We’ll see more examples of this in later posts.
Create – Schema Tool
We just used SQL to create a new schema. However, similar to the Create – Database tool, pgAdmin has a tool for creating a new schema. We won’t create another schema here. However, below are instructions for using the Create – Schema Dialog to create a schema:
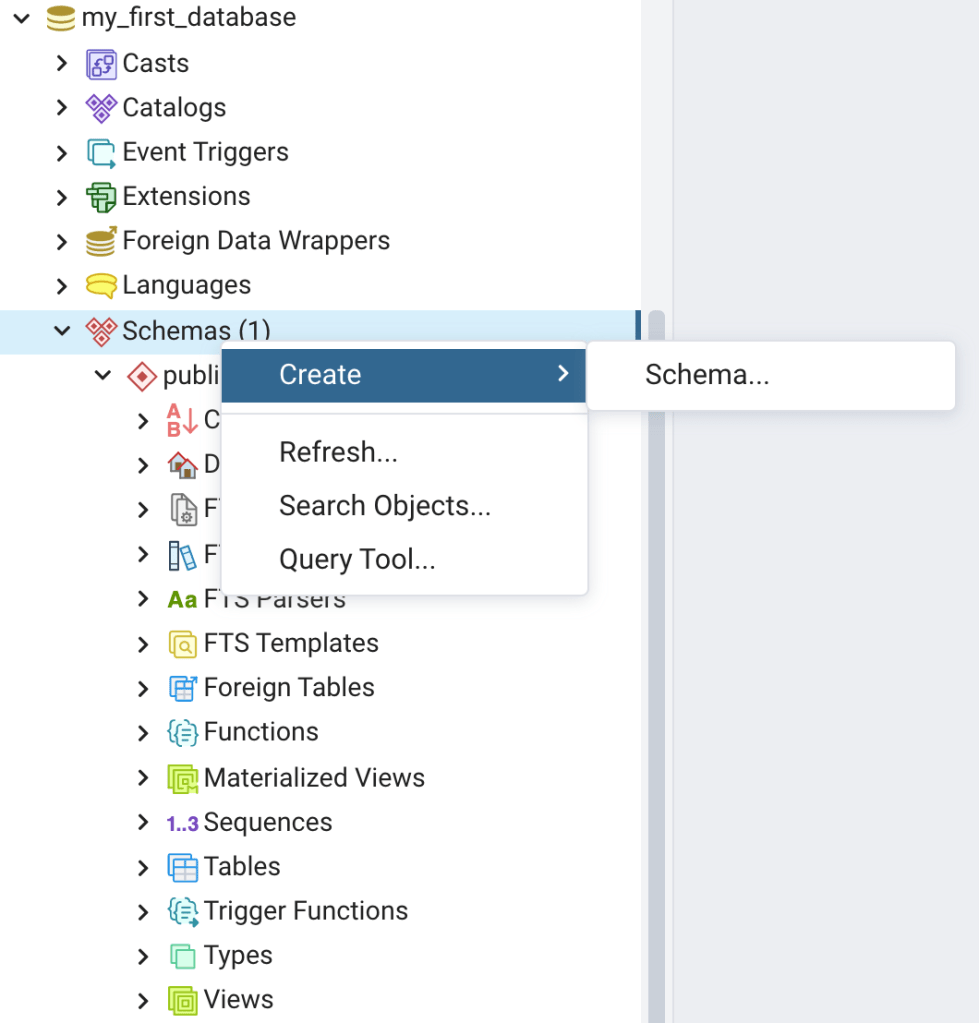
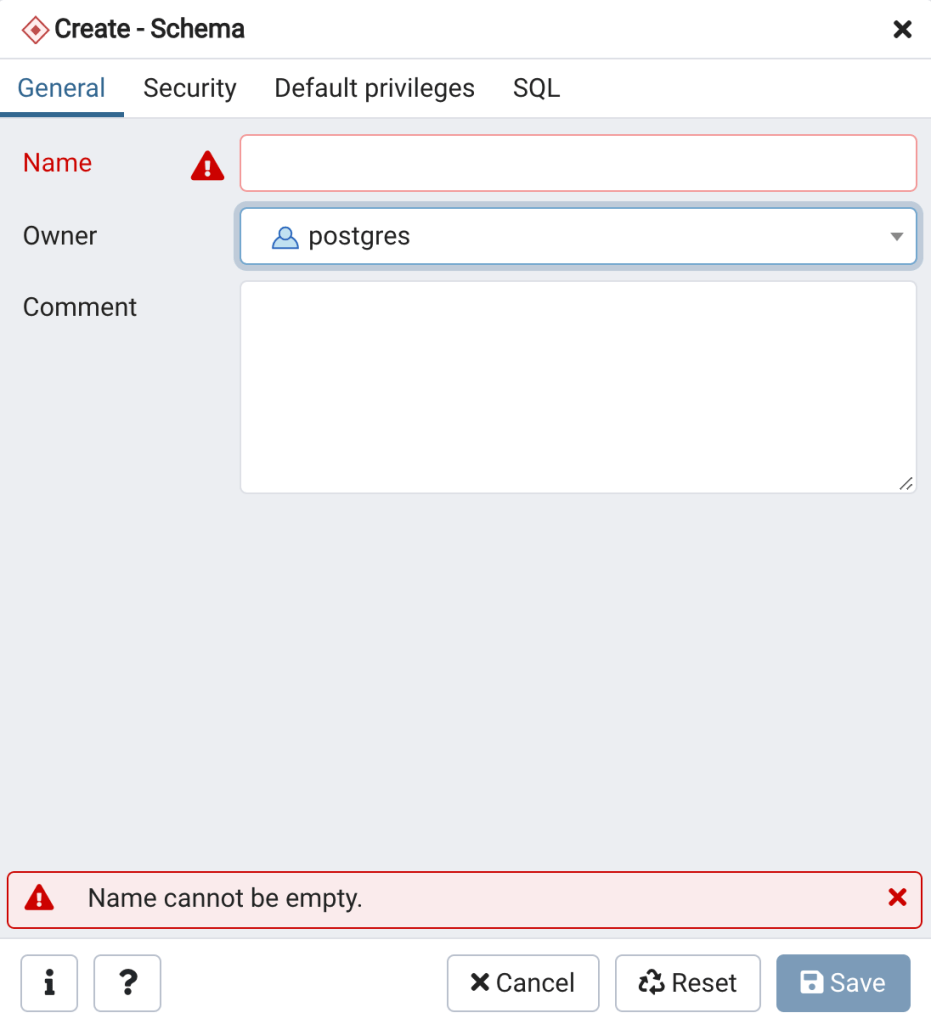
- Right click on Schemas, then click on Create, and then on Schemas… (Figure 7). The Create -Schema Dialog will open (Figure 8).
- To create a schema enter a name for the schema, set the owner, enter a comment that includes a short description of the schema, then click Save.
Create Schema Script Tool
Now go to pgAdmin and navigate to and click on the schemas node in my_first_database. Click on the domains schema which will show the database objects within (Figure 9, left side). On the right side of the screen click on the SQL tab. You should then see the SQL that was used to create the schema (Figure 9, right side).
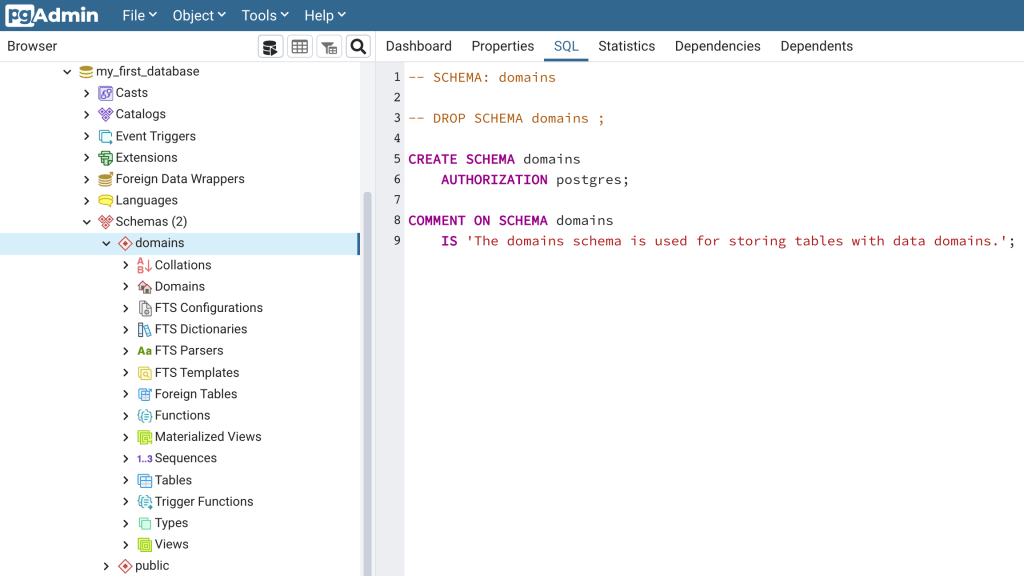
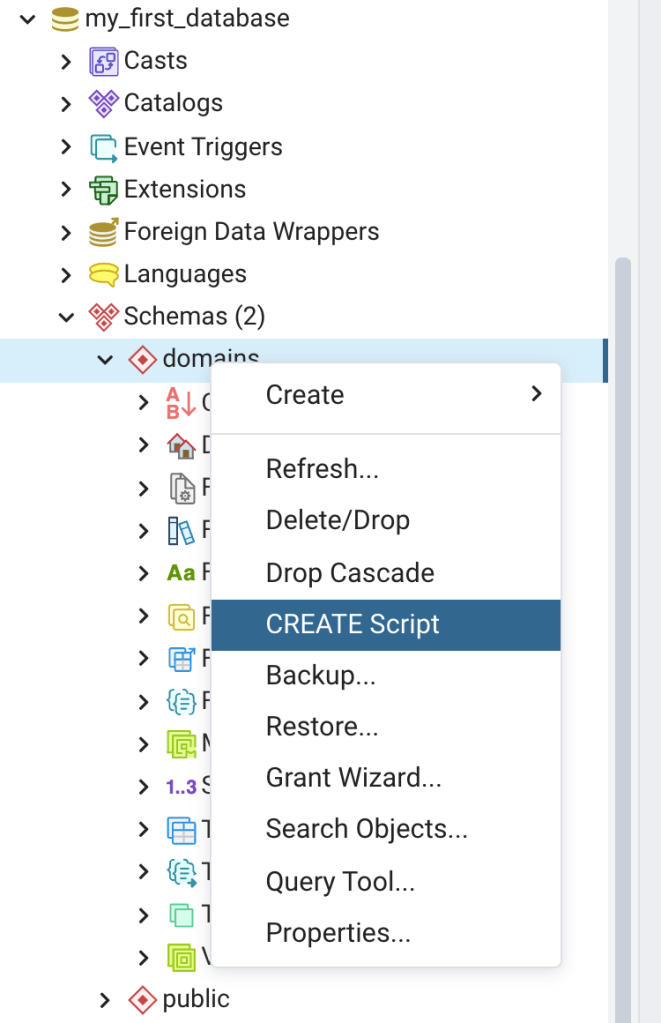
Next, right click on the domains schema, and then click on CREATE Script (Figure 10). A query tool window will open with a SQL script for creating the domains schema. This illustrates that the database stores the metadata for each database object, and can use that metadata to build SQL scripts. The create script tool is useful for learning SQL. For instance, you could use the Create – Schema Dialog to create your first schema, and then use the create script tool to see how you could use SQL to create the schema. The create script tool is also a way to save time if you wanted to create another schema. Just change the schema name after “CREATE SCHEMA”, and the schema name and description after “COMMENT ON SCHEMA”, and hit the execute button.
The Schema Search Path
As was discussed above, schemas in PostgreSQL are used to organize database objects. Therefore, when you create a new database object (e.g., table) or refer to an existing database object in a query you need to specify which schema to use. Dot notation, specifically the domain name followed by the table name separated by a period (see example below), is used to specify the schema when referring to a database object. For instance, the following refers to a hypothetical table (table1) in the domains schema:
domains.table1If you don’t specify a schema that can be OK. However, if a schema is not specified then PostgreSQL will use what is called the “schema search path” to determine the order of priority of schemas to either create the object in or in which to look for the object referred to in a query. PostgreSQL defaults to the public schema as the first priority.
You can see the current schema search path configuration, add new schemas, and customize the search path order of priority using a few simple SQL commands. To view the current search path open a query tool window, type in the following, and hit the Execute button:
show search_pathYou should see the following returned in the Data Output tab in the bottom of the query tool window:
search_path
text
--------
"$user", public
We can see that the new domains schema is not yet included in the search path. To add the domains schema and change the order of the search path to place domains first use the following command.
ALTER DATABASE my_first_database
SET search_path TO "$user", domains, public
You should see something similar to the following returned in the “Messages” tab at the bottom pane of the query tool window:
ALTER DATABASE

Query returned successfully in 92 msec.
Now run the show search_path command again. You should see the following (see also Figure 11):
search_path
text
--------
"$user", domains, public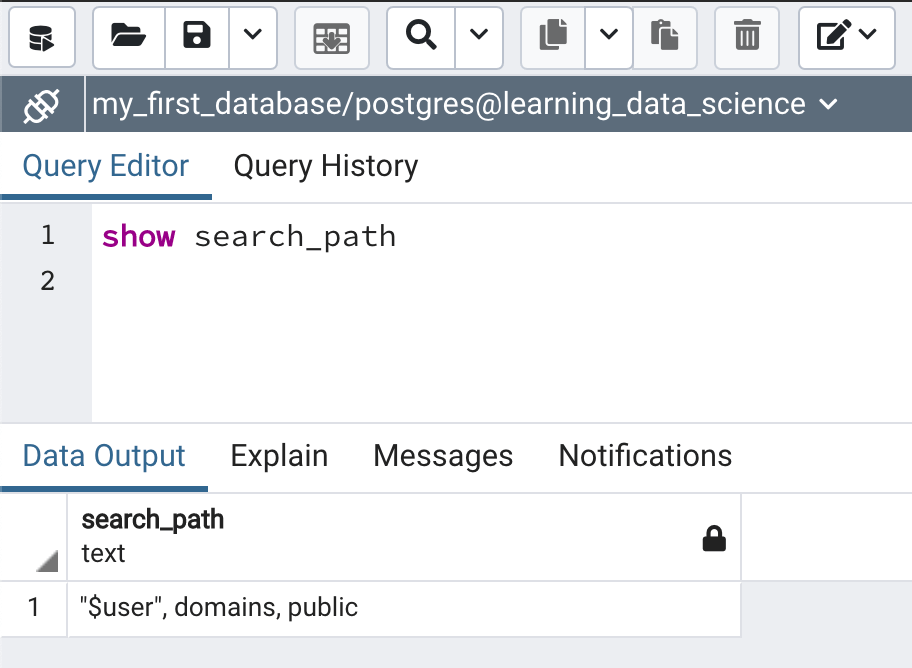
Now the domains schema is included in the search path and is first priority. Therefore when referring to a database object in the domains schema you no longer need to qualify it with the schema name. We’ll try this out in the next post to help solidify the concept of the schema search path by using it in practice.
Recommended Reading
As a supplement to this post I encourage you to read the PostgreSQL documentation on schemas, specifically sections 5.9.1. Creating a Schema, 5.9.2. The Public Schema, and 5.9.3. The Schema Search Path.
Next Time on Elfinwood Data Science Blog
In this post, Lesson 001 of Learning Data Science, we discussed database schemas and created a new schema in my_first_database. In the next post we’ll create a sequence and a data table in my_first_database, and add column comments.
If you like this post then please consider subscribing to this blog (see below) or following me on social media. If you’d like to follow this blog, but you don’t want to follow by subscribing through WordPress then a couple of options exist. You can “Like” the Elfinwood Data Science Blog Facebook Page or send me your email using the form on the Contacts Page and I’ll add you to the blog’s email list.
Follow My Blog
Copyright © 2020, Aaron Wells

One thought on “Lesson 001: Creating a Schema”