
Introduction
In the previous post I introduced the learning-data-science GitHub repository, defined forking a repository, and provided instructions for forking the learning-data-science repository and cloning it to your computer. In this post, we’ll install pgAdmin and PostgreSQL, and create a database. Since data analysis and management are best learned by doing, the objective of this and future posts is to get readers hands on experience using PostgreSQL and R. If you’d like an overview of database software then see the post Databases and Data Management Systems.
If you are not familiar with version control using Git and GitHub, I recommend going back and working through the hands on tutorials in my series on version control starting with “Version Control: An Overview.”
Creating a PostgreSQL Database
While there are several ways to create a PostgreSQL database, for this post we are going to use pgAdmin for this purpose. pgAdmin is a free general user interface (GUI) for administering PostgreSQL databases and interacting with the data within. In a future post I’ll provide an in depth review of pgAdmin and DBeaver, a free multi-platform database tool for developers, database administrators, analysts and all people who need to work with databases.
Installing pgAdmin
Follow the below steps to install:
- Go to the pgAdmin download page at https://www.pgadmin.org/download/
- Scroll down the page a short ways, and under pgAdmin 4 click on the link for your operating system
- Click on the download link for the most recent version of the install files (e.g. pgAdmin 4 v4.28 (released Nov. 12, 2020))
- Once the install files have downloaded, double click to open and begin the install
- Follow the installation instructions that are provided, and accept all default setting.
Install PostgreSQL
The next step is to install PostgreSQL on your computer. To install PostgreSQL follow these steps:
- Go to the PostgreSQL downloads page here: https://www.postgresql.org/download/
- Under “Packages and Installers” click on your operating system.
- Under “Interactive installer by EDB” click on “Download the Installer”. This will take you to the EDB page for PostgreSQL Database Download.
- Download the most recent version of of PostgreSQL that works with your computer. Most recent computers support 64-bit platforms. As of the writing of this post the most recent 64-bit version was 13.1. If you have an older computer you may need to opt for the 32-bit version, the most recent of which as of the writing of this blog, was 10.14.
- Run the installer, and follow the instructions provided. You will be asked to select a port that PostgreSQL will “listen” on. Accept the default port 5432.
- You will also be asked to create a password. Be sure to keep track of the password as you’ll need it to create a server connect in the next section.
- Click OK to begin the install which may take several minutes.
- You may asked to configure Stack Builder. We’ll skip this step for now. You can always go back later and configure this. Click cancel to exit.
- PostgreSQL should now be installed.
If you are an experienced user then there are other options for installing PostgreSQL on your computer. Feel free to use which ever method you prefer. For instance, if you are a MacOS guru you may choose to use Homebrew for the install.
Creating a Database Server Connection
The next step before creating a database is to create a database server connection. For a description of database servers see the “DBMS Software” section of the post Databases and Data Management Systems.
To set up a database server connection using pgAdmin follow these steps:
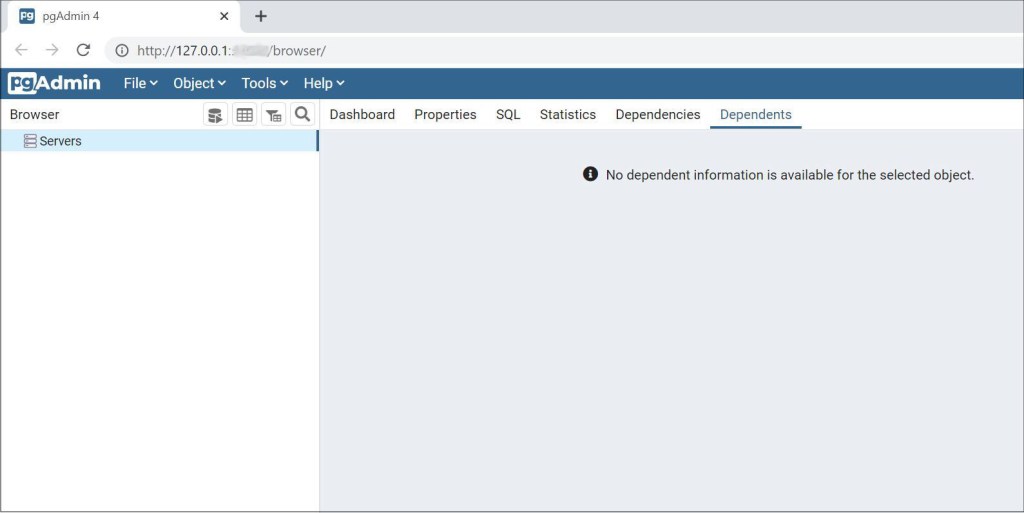
- Open pgAdmin 4. It will open in a web browser (e.g., Chrome) and should look similar to Figure 1.
- Right click on Servers, and then click on Create and then select “Server…” (Figure 2, upper left)
- The “Create – Server” window will open (Figure 2, upper center)
- In the “Create – Server” window on the “General” tab enter the following for the “Name”: learning_data_science
- Click on the “Connection” tab and enter the following for the “Host name/address”: localhost
- The “Port” should already be set as 5432, and the “Maintenance database” and “Username” as postgres. Leave these setting as is.
- Update the “Password” field with the password you selected in step 6 in the previous section on installing PostgreSQL.
- If you’d like to save the password so don’t have to enter it every time you connect to this server then check the “Save password?” checkbox.
- The “Connection” tab should look similar to Figure 2 (upper right) with exception of the Password.
- Click “Save” in the lower right corner.
- Your server connection is now created. Your pgAdmin windows should look similar to Figure 2 (lower pane).
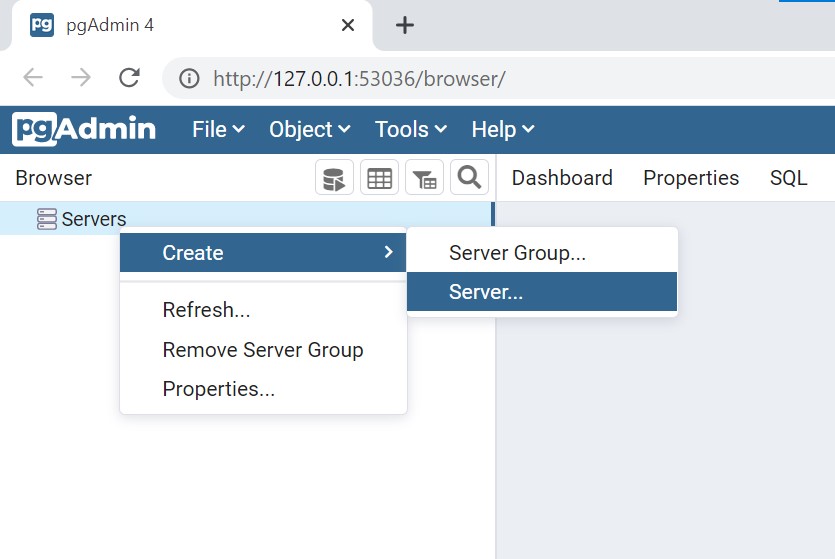
Create Server Connection Menu 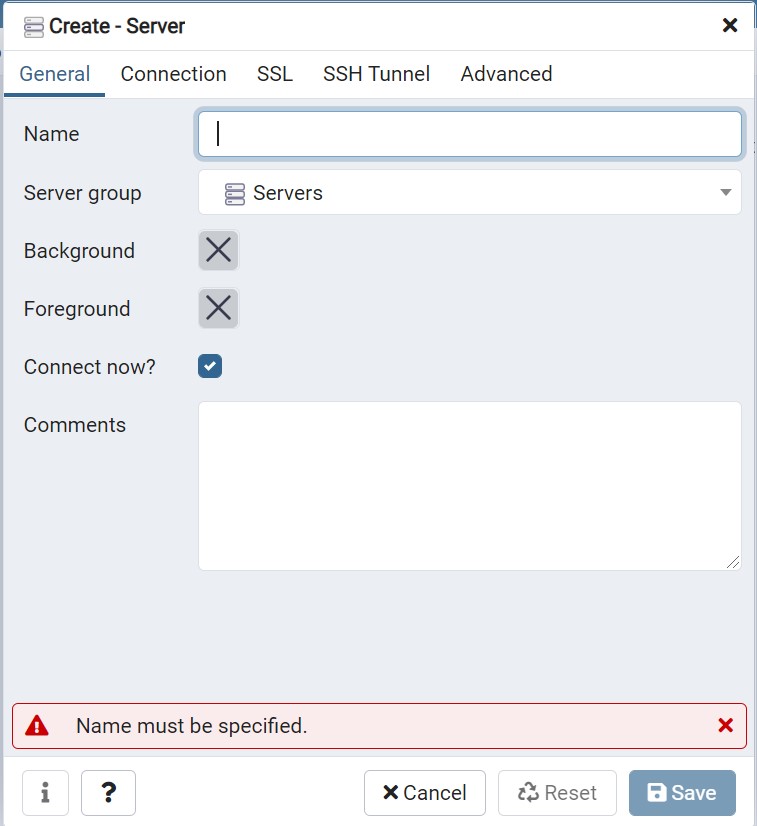
Create Server Window, General Tab 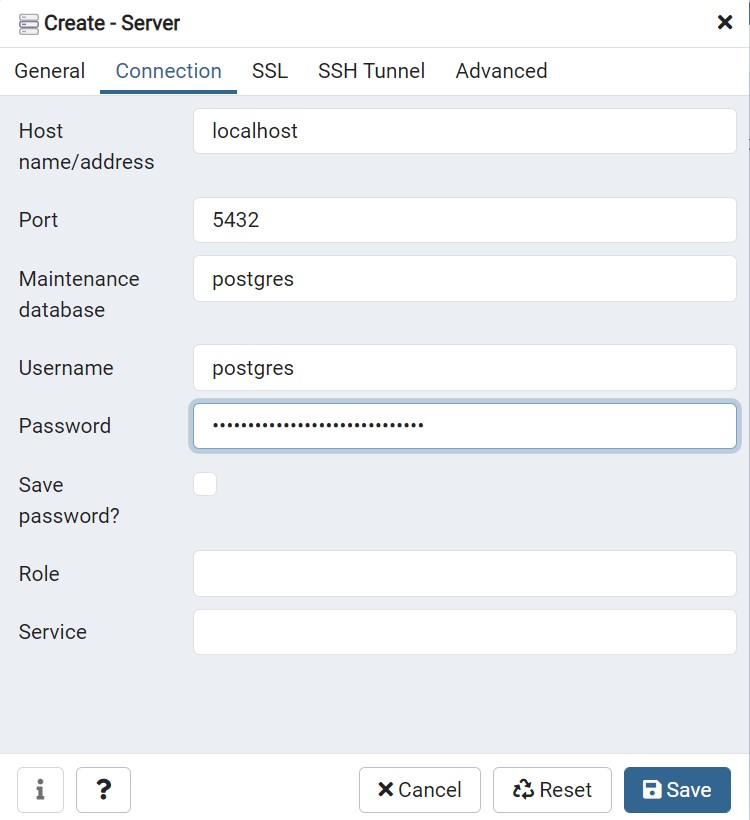
Create Server Window, Connection Tab populated 
pgAdmin 4 with learning_data_science server connection.
If you are a student you may have access to a PostgreSQL database server through your college or university, or if you are a working professional you may be able to work with your IT department and have them set up a PostgreSQL database server for you to use. In either of these cases you would likely be provided with a username to use in place of postgres (Step 6 above). If you use one of these methods then you would replace the “Host name/address” localhost with name of your university of office server (Step 5 above). Lastly, if you’re an experienced user you may wish to use psql at the command line to set up your database server connection. Feel free to use whatever method works best for you.
Creating a Database
Now that we have a server connection set up we can create a database. You’ll notice that, upon creating the server connection, there is a default database, entitled “postgres”, that is automatically created (Figure 2, lower panel). This is the default administrative connection database for use in periodic maintenance by a database administrator. Periodic maintenance tasks may include backing up databases, vacuuming databases, or updating user credentials. The maintenance database can be used for managing data like any other database, can be renamed, and can be used as a template for creating new databases. Unless you are an IT professional then you won’t have to worry too much about database maintenance, and this is beyond the scope of this blog.
If you’re using PostgreSQL on a university or office server then your IT department will handle server and database maintenance. If you’re using PostgreSQL on a personal computer then you’ll likely be the only user and database maintenance will be a pretty low effort. Backing up databases is likely the most important periodic task you’ll need to perform, and we’ll cover backing up PostgreSQL databases in a later post.
For the purpose of this blog we’ll ignore the “postgres” database, and instead we’ll create a new database to use in conjunction with the learning-data-science GitHub repository.

Follow the below steps to create a new database using pgAdmin:
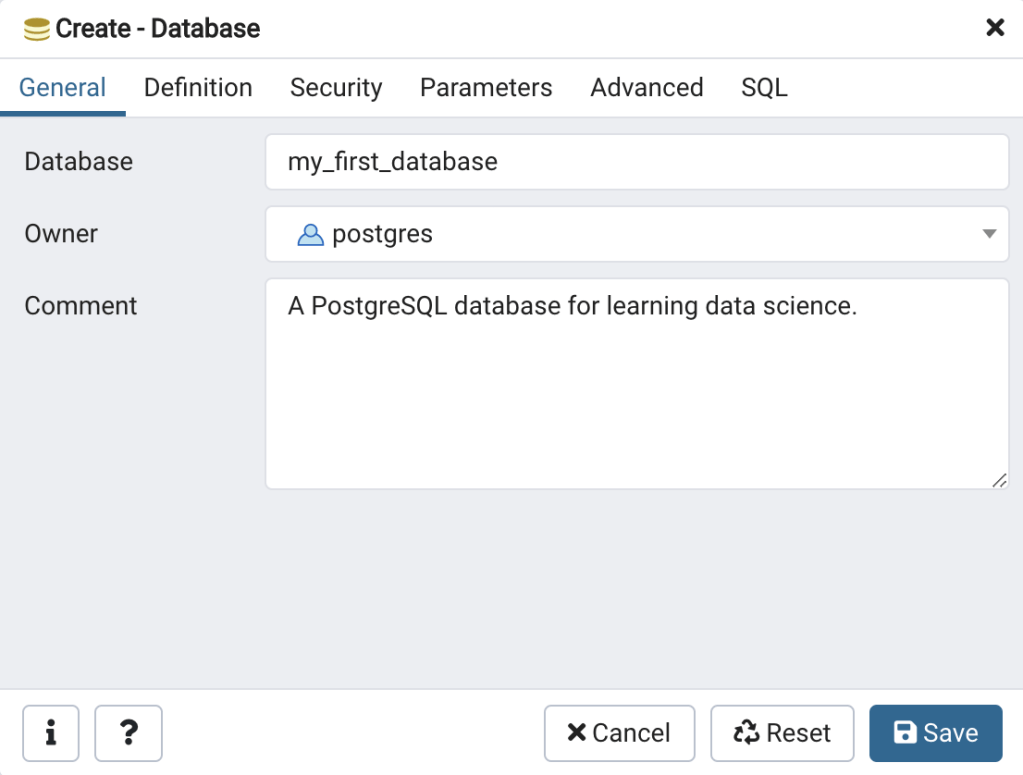
Create – Database General Tab 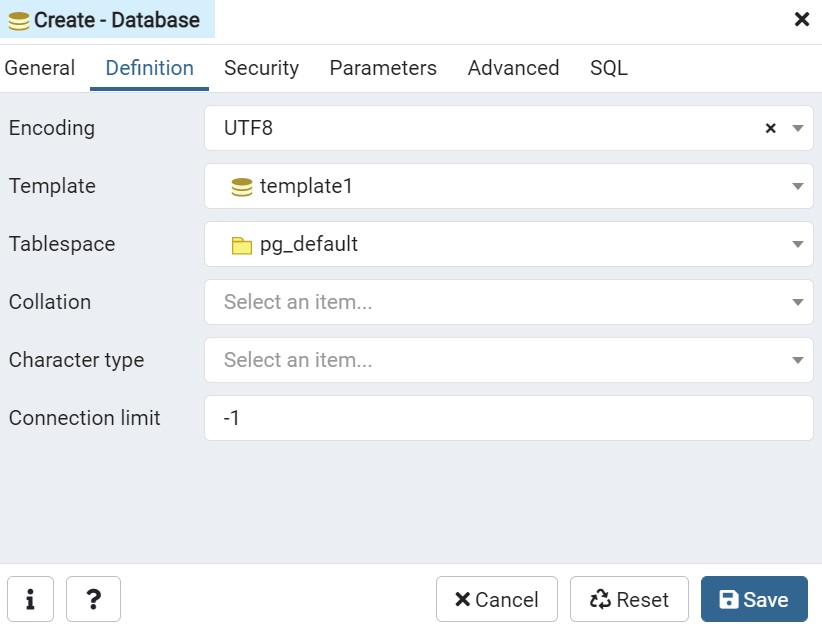
Create – Database Definition Tab 
Create – Database Security Tab
- In pgAdmin, in the Browser panel, right click on Databases, then on Create, and then Database (Figure 3). The Create – Database window will open on the General tab (Figure 4, left).
- Enter the Database name my_first_database, leave the owner as postgres, and enter the following into the “Comment” field: A PostgreSQL database for learning data science. The General tab should look like the left image in Figure 4.
- Next click on the Definition tab and fill it out so that it looks like the center image in Figure 4. We are setting the character encoding to the default UTF8, we going to use template1 (the default, built in database template), and tablespace pg_default. The default connection limit of -1 means that an unlimited number of connections can be made to the database. *Note that UTF8 character encoding supports most spoken languages. You can check if your language is supported here: http://www.unicode.org/standard/supported.html
- Now click on the Security tab and then on the “+” button on the far right side of the “Privileges” row. Under “Grantee” select postgres and under privileges click the checkbox next to ALL (Figure 4, right).
- Now click on the SQL tab. You will see that pgAdmin has used the settings you added in the various tabs to prepare a CREATE DATABASE SQL script (Figure 5). This illustrates that a database can be created either using the GUI tools (as above) or by writing a SQL script.
- Lastly, click the Save button. Your new database has been created (Figure 6).

Take a look at pgAdmin and you’ll see you now have 2 databases as indicated by the number 2 in parentheses next to the “Databases” node. Click on the my_first_database node to connect to the database. The node will expand downward to show the various nodes within the database, for instance Schemas (Figure 6, left side). Also, note the right pane in the pgAdmin window includes several tabs. If you click on the SQL tab it will show the SQL used to create the database (Figure 6, right side). And Voilà, just like that you’ve created your first database.

Recommended Reading
As a supplement to this post, I encourage you to read the POSTGRESQL Tutorial on Installing PostgreSQL on Windows, Installing PostgreSQL on MacOS, and the EDB Tutorial on Connecting PostgreSQL using psql and pgAdmin.
Next Time on Elfinwood Data Science Blog
In this post, we installed pgAdmin and PostgreSQL, and created a database. In the next post, I’ll discuss database schemas and use the files in the Lesson_001 folder of the learning-data-science repository to create a new schema in my_first_database.
If you like this post then please consider subscribing to this blog (see below) or following me on social media.If you’d like to follow this blog, but you don’t want to follow by subscribing through WordPress then a couple of options exist. You can “Like” the Elfinwood Data Science Blog Facebook Page or send me your email using the form on the Contacts Page and I’ll add you to the blog’s email list.
Follow My Blog
Copyright © 2020, Aaron Wells

3 thoughts on “Creating a PostgreSQL Database”