
Introduction
In the previous post I presented detailed instructions for a commonly used workflow for managing files using version control. In this post, the fourth in a 5 part series on version control, I’ll be instructing readers on reverting changes and viewing differences in Git. Since version control and data management are best learned by doing, the objective of this and future posts is to get readers hands on experience with using version control and managing data using PostgreSQL.
For this and future posts we are going to use git on the command line, meaning using the terminal in Mac OS and Git Bash in Windows. To open up a command line window click here, and follow the instructions.
Reverting Changes
One of the useful features of using a version control system is that if you decide at any time that you want to go back to an earlier version of a file, you can easy do so. Recall that in the process of committing git takes a “snapshot” of a repository, and these snapshots are collectively referred to as the “commit history”. Recall also that the “git log” command can be used to view the commit history, including the commit hashes, i.e., the unique identifier assigned to each commit. The “git revert” command is used to go back an earlier “snapshot” of a repository. Let’s try this out using the README.md file, and revert to an earlier version. At the end of the last post the README.md file looked like Figure 1.

To use “git revert” we need to know the hash for the commit that we want to revert. To see the commit hashes type the following into the command line and hit Enter:
git log --pretty=onelineThe result will be the commit history, which should look something like this:
a6d01fd93e487cec29165018be92a9d615bf2360 (HEAD -> master, origin/master, origin/HEAD) Updated new_file.txt, added a new sentence.
c8646b1d9e406170ad4a601b5e34f18807b9a719 added new_file.txt, initial commit
1c51bd0af43c7aa5b26dbc320d6b49a03371e702 added a second sentence to README.md
e122fb022d1da68a834f3312ecc1adccf66b0f95 Initial commit
To illustrate the use of “git revert” let’s revert the commit with the message “added a second sentence to README.md”. Type “git revert” into the terminal, then copy in the hash from the commit that we want to revert (similar to below), and hit Enter.
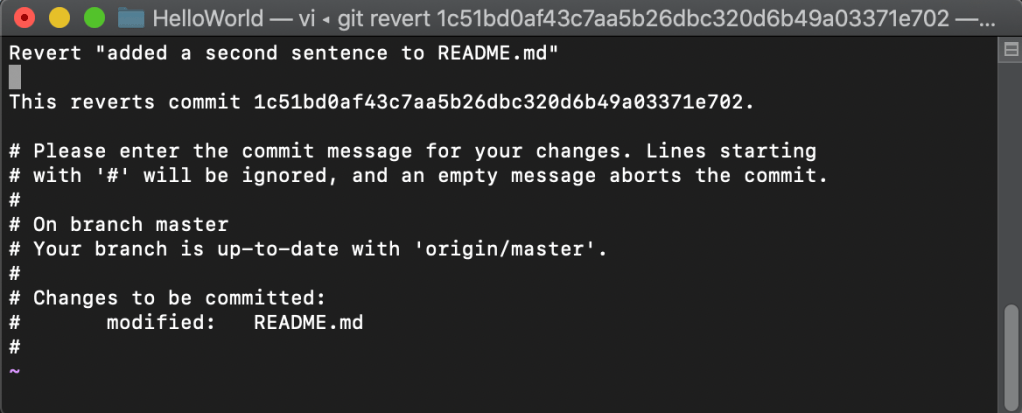
git revert 1c51bd0af43c7aa5b26dbc320d6b49a03371e702After you hit return a text editor will open, into which you need to type a commit message. On Mac OS the text will likely be Vi (Figure 2).
On Windows, GitBash will provide you a hint regarding the text editor (Figure 3). Also, the GitBash settings window may open automatically before the text editor opens. You can ignore the hint and settings for now.

Click OK in the settings window, and then a text editor should open (Figure 4).

Depending on your operating system follow the instructions below to save a commit message for the revert:
Mac OS
- Type i to switch into insert mode so that you can begin editing the file.
- Enter a commit message (Figure 2).
- Once you’re done, press the escape key to exit insert mode and enter back to command mode.
- Type :wq to save (w = write) and exit (q = quit) the file.
Windows
- Move the cursor to line one.
- A default commit message should have been automatically populated at line one. If so, then make a small change (e.g. push the space bar). This should activate the “Save” icon in the upper left corner (Figure 4).
- Click “Save” and close the text editor.
- If there was no default message, then enter a commit message onto line one and click save and close the text editor.
After you’ve entered a commit message and closed the text editor you should see a message similar to the one below confirming the revert was a success.
[master 290adad] Revert "added a second sentence to README.md"
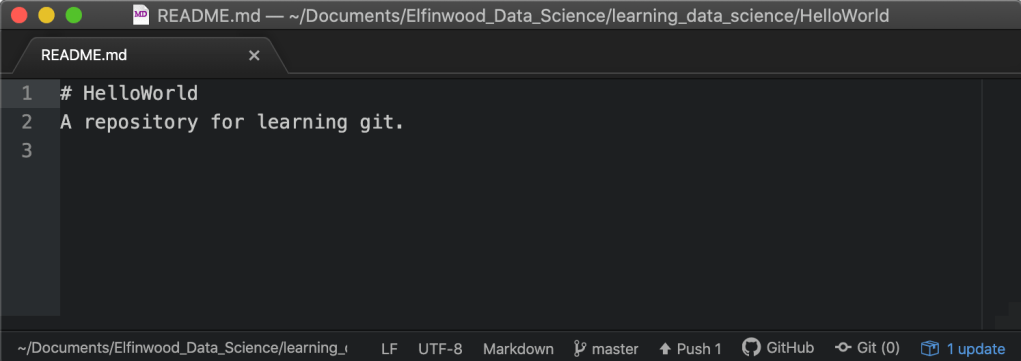
1 file changed, 1 insertion(+), 1 deletion(-)Next, open README.md. The second sentence will now be gone (Figure 5)!
Now use “git status” to check the status. You should see something like the following:
On branch master
Your branch is ahead of 'origin/master' by 1 commit.
  (use "git push" to publish your local commits)
We can see from the above message that the process of reverting also performs a commit. Next, use “git push” to push the changes to the remote repository.
Viewing Differences
In the previous post we covered viewing differences between commits in GitHub. There are a couple of other ways to check differences at various stages of the file management process. To illustrate these other options, open the README.md file and type in the second sentence again. Then save and close the file. Check the status using the git status command. The result should look like this:
On branch master
Your branch is up-to-date with 'origin/master'.

Changes not staged for commit:
  (use "git add …" to update what will be committed)
  (use "git checkout -- …" to discard changes in working directory)

     modified: README.md

no changes added to commit (use "git add" and/or "git commit -a")
If you’ve been following the past few posts you should now know what this means. Essentially, a change has been made in your local repository, but the changes haven’t been staged yet.
View Differences using “git diff”
Let’s say that for some reason you weren’t sure what changes had been made to README.md, and before staging the changes using “git add”, that you wanted a way to check what had changed. Lucky for you there is the “git diff” command. Let’s try this.
In the terminal type the following and hit Return.
git diffYou should see something like the following message returned:
diff --git a/README.md b/README.md
index 3d9d39a..3127dcd 100644
--- a/README.md
+++ b/README.md
@@ -1,2 +1,2 @@
# HelloWorld
-A repository for learning git.
+A repository for learning git. Learning git is fun!
The diff message includes several pieces of information. The first lists the 2 files being compared, in this case 2 different versions of README.md. The first, a/README.md, is the recently committed version of the file, and b/README.md is the version of the file in the working directory, i.e., the version that you just edited by typing in the second sentence again.
The second line contains information about the files, which you aren’t likely to need. However, for the sake of completeness I’ll explain what this line contains. The first 2 alpha-numeric values are the individual file hashes. Files hashes differ from the commit hashes in that the commit hashes represent snapshots of the entire repository, whereas the file hashes represent snapshots of each file. To illustrate this enter “git show” followed by the first file hash (similar to below) into the terminal and hit Enter:
Commit Best Practice: Commit changes to only one file at a time. Since each commit contains a snapshot of the entire repository, you should plan your commits carefully. Each commit should represent a state that you may want to revert back to. For instance, were you to commit changes to 2 or more files in a single commit, and later you wanted to revert the changes in only one of those files, you wouldn’t be able to do that without reverting the changes in the other files too.
git show 3d9d39aYou should see the contents of the first file, i.e., the recently committed version of README.md):
# HelloWorld
A repository for learning git.
Now do the same for the second file hash. You should see the contents of the current working version of README.md:
# HelloWorld
A repository for learning git. Learning git is fun!
The 3rd value on the second line is the file mode, 100644, which means it’s a normal file (Chacon and Straub 2020). Other options are 100755, for executable files; and 120000 which specifies a symbolic link. So, now you know what the second line of the diff message is all about, and now you can completely forget about it (Ha Ha).
Lines 3 and 4 show the symbols that will be used in the lower part of the message to represent each file version. Line 5 is the start of a “chunk” (also referred to as a “hunk”), each of which contains short sections of the files where differences occur. The numbers between the @ symbols represent the line numbers of each file (represented by the + and – symbols) that are being display. The last 3 lines show the text from the 2 versions of file. The header line “# HelloWorld” is common to both files and thus is shown only once. The second line of each file is what is different between the files, thus it is shown twice, once from the most recently committed version (-), and once from the working version (+).
Viewing Differences in the Atom Text Editor
I highly recommend using Atom as your text editor. Atom is a free, open source text editor that it built by the folks that manage GitHub, and thus Git and GitHub are seamlessly integrated into it. In case you missed it, an overview of recommended text editors is provided in the post “Getting Started with Version Control”.
Atom provides tools for viewing differences right in the text editor. If you are using Atom as your text editor please follow along through the next section on your computer.
To view differences in Atom follow these steps:
- Open README.md in Atom
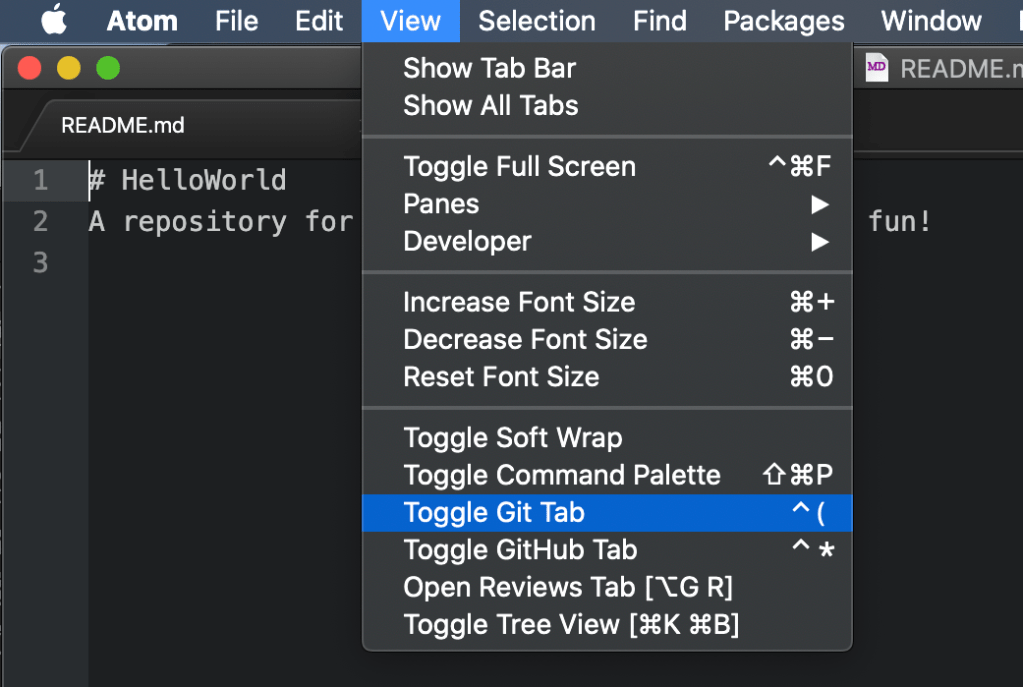
- Move your mouse to the top of the screen and click on “View” (Figure 6)
- Move your mouse down to “Toggle Git Tab” and click it
- The Git Tab will open.
Figure 7 shows Atom with the Git Tab open. On the Git Tab you will see sections for Unstaged Changes (under which is listed README.md), Staged Changes, and a text box for writing a commit message, and a “Commit to master” button. Click on README.md. Another pane will open that displays the unstaged changed for README.md.

Here we see some similarities with the git diff message, for instance near the top there is the “chunk” header surrounded by @ symbols, and below that are the lines from each file. Atom color codes the lines to visually differentiate lines that are the same between both version (black), and the lines that are different (red for the recently committed version and green for the version in the working directory). We can also see that the Git Tab provides some tools for staging and commit changes right in the text editor.
Viewing Differences for Staged Files
Thus far we’ve only viewed differences for unstaged changes. Let’s now go back to the terminal and stage the changes to README.md using the “git add” command. Once you’ve staged the changes, go ahead and type “git diff” into the terminal and hit enter. You’ll see that nothing is returned. That’s because “git diff” only works to view unstaged changes. To view differences for staged files use the following command in the terminal:
git diff --cachedAfter hitting Enter, the result should be the same diff message that we saw earlier. Now go back to Atom. You should see that Atom moved README.md from the “Unstaged Changes” section to the “Staged Changes” section, and the differences between the recently committed version and the staged version are shown to the left.
Let’s commit the changes to README.md and then push those changes to the remote repository. Please use the commit message from the following code block.
git commit -m "again added a second sentence to READMD.md"After you’ve pushed the changes, go back to Atom. You should see that there are no longer any files listed under “Staged Changes”, and the pane to the left should have a message saying “No changes to display.” This is because your changes have been committed and your local and remote repositories are now exactly the same, that is, there are no more differences.
Next check the commit history in the terminal using the “git log –pretty=oneline” command. You should see something like the following:
151599d9ef4835948e61a38ecf5537d8b18cdb10 (HEAD -> master, origin/master, origin/HEAD) again added a second sentence to READMD.md
290adad86a5749860fd0455a01f4fd2da65ddb4d Revert "added a second sentence to README.md"
a6d01fd93e487cec29165018be92a9d615bf2360 Updated new_file.txt, added a new sentence.
c8646b1d9e406170ad4a601b5e34f18807b9a719 added new_file.txt, initial commit
1c51bd0af43c7aa5b26dbc320d6b49a03371e702 added a second sentence to README.md
e122fb022d1da68a834f3312ecc1adccf66b0f95 Initial commit
Note that the commit history contains the commit for the first time you revised README.md to add a second sentence (commit ending in …71e702), the commit in which you reverted the …71e702 commit (…5ddb4d), the latest commit in which the second sentence was added back in again (…8cdb10), and all commit in between. This emphasizes what we’ve already learned, that git keeps track of the entire history of the repository, and you can revert back to any of these “snap shots” at any time.
Recommended Reading
As a supplement to this post, I encourage you to read section 2.4 in Pro Git: Everything you need to know about Git, and the documentation on git revert and git diff.
Next Time on Elfinwood Data Science Blog
In this post I covered reverting changes and viewing differences using Git. In the next post, the last in a 5 part series on version control, I’ll cover using branches and merging in Git.
If you like this post then please consider subscribing to this blog (see below) or following me on social media. If you’d like to follow this blog, but you don’t want to follow by subscribing through WordPress then a couple of options exist. You can “Like” the Elfinwood Data Science Blog Facebook Page or send me your email using the form on the Contacts Page and I’ll add you to the blog’s email list.
Literature Cited
Chacon S. and B. Straub. 2020. Pro Git: Everything you need to know about Git. Version 2.1.264. Apress. New York, NY. 521 pp. Online here: https://git-scm.com/book/en/v2 (accessed 2020-09-26).
Follow My Blog
Copyright © 2020, Aaron Wells

2 thoughts on “Version Control: Reverting & Diffs”